Networks Training

  • About
  • My Books
  • SUGGESTED TRAINING
  • HOME
  • Cisco Networking
    • Cisco General
    • Cisco IOS
    • Cisco VPN
    • Cisco Wireless
  • Cisco ASA
    • Cisco ASA General
    • Cisco ASA Firewall Configuration
  • Certifications Training
    • CCNA Training
    • Cisco Certifications
    • I.T Training
  • General
    • General Networking
    • IP Telephony
    • Network Security
    • Product Reviews
    • Software
  • Cisco Routers
  • Cisco Switches
You are here: Home / Cisco Switches / Basic Cisco Switch Configuration

Basic Cisco Switch Configuration

Written By Harris Andrea

In my opinion, the Cisco switches are the best in the market. Versatile, reliable, flexible and powerful, the Cisco switch product line (such as the 2960, 3560, 3650, 3850, 4500, 6500, 9400 series etc) offer unparalleled performance and features.
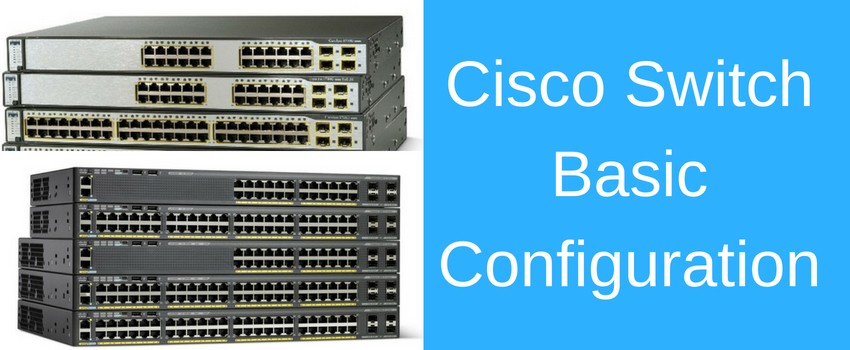
cisco switches

Although a Cisco switch is a much simpler network device compared with other devices (such as routers and firewalls for example), many people have difficulties to configure a Cisco Catalyst Switch.

Unlike other lower class switch vendors (which are plug-and-play), the Cisco switch needs some initial basic configuration in order to enable management, security and some other important features.

In this article I will describe the basic steps needed to configure and setup a Cisco switch from scratch. I don’t like graphical GUI or web management at all, so I will show you command line configuration (CLI) which is much more powerful and actually forces the administrators to learn what they are doing on the device.

STEP1: Connect to the device via console

Use a terminal emulation software such as PuTTY and connect to the console of the switch. You will get the initial command prompt “Switch>”

Type “enable” and hit enter. You will get into privileged EXEC mode (“Switch#”)

Now, get into Global Configuration Mode:

Switch# configure terminal
Switch(config)#

Note: The switch will not ask you for a password when entering into Privileged EXEC mode (i.e after typing “enable”) if it has the default factory configuration. See Step 3 below about setting up a password for the Privileged EXEC mode. 

STEP2: Set up a hostname for the particular switch to distinguish it in the network

Switch(config)# hostname access-switch1
access-switch1(config)#

STEP3: Configure an administration password (enable secret password)

access-switch1(config)# enable secret somestrongpass

The password above will be used to enter into Privileged EXEC mode as described in Step 1 above. 

MORE READING:  What is VLAN Trunking and VTP - Configuration Example and Description

STEP4: Configure a password for Telnet and Console access

It is a very good security practice to lock-down all access lines of a switch with a password. Although it is much better to configure an external AAA server (for centralized Authentication Authorization and Accounting), in this article we will just configure a password on each access line (VTY lines for Telnet and Console line):

access-switch1(config)# line vty 0 15
access-switch1(config-line)# password strongtelnetpass
access-switch1(config-line)# login
access-switch1(config-line)# exit
access-switch1(config)#

access-switch1(config)# line console 0
access-switch1(config-line)# password strongconsolepass
access-switch1(config-line)# login
access-switch1(config-line)# exit
access-switch1(config)#

STEP5: Define which IP addresses are allowed to access the switch via Telnet

access-switch1(config)# ip access-list standard TELNET-ACCESS
access-switch1(config-std-nacl)# permit 10.1.1.100
access-switch1(config-std-nacl)# permit 10.1.1.101
access-switch1(config-std-nacl)# exit

!Apply the access list to Telnet VTY Lines
access-switch1(config)# line vty 0 15
access-switch1(config-line)# access-class TELNET-ACCESS in
access-switch1(config-line)# exit
access-switch1(config)#

STEP6: Assign IP address to the switch for management

!Management IP is assigned to Vlan 1 by default
access-switch1(config)# interface vlan 1
access-switch1(config-if)# ip address 10.1.1.200 255.255.255.0
access-switch1(config-if)# exit
access-switch1(config)#

STEP7: Assign default gateway to the switch

access-switch1(config)# ip default-gateway 10.1.1.254

STEP8: Disable unneeded ports on the switch

! This step is optional but enhances security
! Assume that we have a 48-port switch and we don’t need ports 25 to 48

access-switch1(config)# interface range fa 0/25-48
access-switch1(config-if-range)# shutdown
access-switch1(config-if-range)# exit
access-switch1(config)#

STEP9: Configure Layer2 VLANs and assign ports to the them

By default, all physical ports of the switch belong to the native VLAN1. One of the most important functions of an Ethernet switch is to segment the network into multiple Layer2 VLANs (with each VLAN belonging to a different Layer3 subnet).

MORE READING:  10 Different Types of Network Ethernet Switches for Small or Large Networks

In order to do the above Layer2 segmentation you need to create additional VLANs from the default VLAN1 and then assign physical ports to these new vlans. Let’s create two new vlans (VLAN2 and VLAN3) and assign two ports to each one.

! First create the Layer2 VLANs on the switch

access-switch1(config)# vlan 2
access-switch1(config-vlan)# name TEACHERS
access-switch1(config-vlan)# exit

access-switch1(config)# vlan 3
access-switch1(config-vlan)# name STUDENTS
access-switch1(config-vlan)# exit

! Now assign the physical ports to each VLAN. Ports 1-2 are assigned to VLAN2 and ports 3-4 to VLAN3

access-switch1(config)# interface range fa 0/1-2
access-switch1(config-if-range)# switchport mode access
access-switch1(config-if-range)# switchport access vlan 2
access-switch1(config-if-range)# exit

access-switch1(config)# interface range fa 0/3-4
access-switch1(config-if-range)# switchport mode access
access-switch1(config-if-range)# switchport access vlan 3
access-switch1(config-if-range)# exit

STEP10: Save the configuration

access-switch1(config)# exit
access-switch1# wr

The above command to save the configuration can also be accomplished with  copy run start

The above are some steps that can be followed for basic set-up of a Cisco switch. Of course there are more things you can configure (such as SNMP servers, NTP, AAA, Vlan trunking protocol, 802.1q Trunk ports, Layer 3 inter-vlan routing etc) but those depend on the requirements of each particular network.

Some Useful “Show” Commands

After configuring the basic steps above, let’s see some useful commands to monitor your configuration or troubleshoot possible problems:

access-switch1# show run  (Displays the current running configuration)
access-switch1# show interfaces  (Displays the configuration of all interfaces and the status of each one)
access-switch1# show vlan  (Displays all vlan numbers, names, ports associated with each vlan etc)
access-switch1# show interface status  (Displays status of interfaces, speed, duplex etc)
access-switch1# show mac address-table  (Displays current MAC address table and which MAC address is learned on each interface)

Related Posts

  • How to Configure a Loopback Interface on Cisco Router & Switch
  • Cisco Switch Layer2 Layer3 Design and Configuration
  • Description of Switchport Mode Access vs Trunk Modes on Cisco Switches
  • What is an SFP Port-Module in Network Switches and Devices
  • 8 Different Types of VLANs in TCP/IP Networks

Filed Under: Cisco Switches

Download Free Cisco Commands Cheat Sheets

Enter your Email below to Download our Free Cisco Commands Cheat Sheets for Routers, Switches and ASA Firewalls.

We use Elastic Email as our marketing automation service. By submitting this form, you agree that the information you provide will be transferred to Elastic Email for processing in accordance with their Terms of Use and Privacy Policy. Also, you allow me to send you informational and marketing emails from time-to-time.

About Harris Andrea

Harris Andrea is an Engineer with more than two decades of professional experience in the fields of TCP/IP Networks, Information Security and I.T. Over the years he has acquired several professional certifications such as CCNA, CCNP, CEH, ECSA etc.

He is a self-published author of two books ("Cisco ASA Firewall Fundamentals" and "Cisco VPN Configuration Guide") which are available at Amazon and on this website as well.

Comments

  1. Shawki says

    April 20, 2012 at 4:06 pm

    I love your tutorials. Are you the writer of the book advertised on this page? If so would the book help with the Cisco examinations?

  2. Blog Admin says

    April 20, 2012 at 7:09 pm

    Shawki,

    I’m glad you like my tutorials. Yes, I’m the writer of the book you see here (Cisco ASA Firewall Fundamentals). It will help you for the FIREWALL exam (CCNP Security) as a supplementary book but you will need more resources to pass the exam.

  3. friday ivan says

    July 15, 2013 at 6:22 am

    what is the defferent between wr used to save configuration and copy run start, thanks i liked the configurations used. they are cool and understandable

  4. Blog Admin says

    July 15, 2013 at 10:39 am

    “wr” and “copy run start” are exactly the same thing.

  5. habel says

    May 20, 2019 at 11:30 am

    common different between switch and router

  6. Harris Andrea says

    May 20, 2019 at 12:51 pm

    A switch works at Layer 2 of the OSI model whereas a router works at Layer3 of the OSI. On a router you will have to configure IP addresses to its interfaces and also a routing protocol (either dynamic routing such as OSPF, EIGRP etc or static routing).

  7. Joshua Aloyokey says

    October 3, 2019 at 6:03 am

    access-switch1(config)# wr: this bit is wrong, “write/wr” will be after exiting the configuration mode because tried couple of times and did not work, after exiting the config mode it work

  8. Harris Andrea says

    October 3, 2019 at 11:29 am

    You are right. I forgot one “exit” command. The article is updated now.

  9. Sam says

    October 23, 2019 at 5:09 pm

    that’s simple, strait and direct to the point .. exactly what I was looking for
    thank you so much

  10. Harris Andrea says

    October 23, 2019 at 6:53 pm

    Sam, I’m glad you liked my tutorial. Have a great day.

    Harris

  11. Jeffrey Numbo says

    November 7, 2019 at 4:42 am

    I really understand how to configure a switch

  12. Jessel says

    November 19, 2019 at 7:10 pm

    What is the full meaning of “wr”

  13. Harris Andrea says

    November 19, 2019 at 7:31 pm

    Jessel,
    The full meaning of “wr” is “write running-configuration in startup-configuration“. This means that it will save the current running configuration (which is loaded into RAM memory) to the startup-configuration in flash memory. The next time you reboot the device, the current running configuration will be loaded from flash memory (as startup-config).

  14. Jessel says

    December 3, 2019 at 8:29 pm

    I assigned IP address to, lets say vlan 10 as the default vlan.

    But the state did not change to up.

    Is there something I did not do right?

  15. Harris Andrea says

    December 4, 2019 at 9:05 am

    You need to have at least one physical port in that vlan which must be up (i.e connected to a host)

  16. beke says

    December 28, 2019 at 12:58 pm

    i realy love it tnx so much if u have any configuration chet shet pls send me in my mail tnx a lot

  17. Ron says

    January 15, 2020 at 7:31 pm

    I have an older 3750x 24 port that I would like to configure for my homes networking system. Will the same tutorial apply?
    I’m just not sure how to configure it to work on my home modem.
    Basically, my plan is to have my modem connected to the switch and then add a couple of Access Points, and a run data connection drops to each room for a hard wired connection.

    Thanks

  18. Harris Andrea says

    January 16, 2020 at 5:39 am

    Ron, yes the tutorial will apply to your case as well. The simplest configuration is to leave all ports in the default Vlan 1 (i.e do not create any VLANs on the switch) and just connect your modem and Access Points to the switch.

  19. mekonnen says

    March 22, 2020 at 3:45 am

    yes best

  20. Delubio L de Paula says

    March 22, 2020 at 5:17 pm

    Hello, I have no experience with Network, but I do have two Cisco Catalysts 3560 and two Cisco Routers 1841.
    I hate WI-FI they get slow, it drops signal from time to time. Internet is SLOW.
    I bought a new apartment and the configuration of my physical apartment is 3 bedrooms, 1 kitchen, 1 living room, 1 family room, 1 office and 1 laundry room.
    Yesterday I started braking all my walls to pass my gigabit Cat-6 Furukawa and giving every room at least one RJ-45 port. My Living room is big and will have two ports.
    My ISP will be inside my office’s room.
    So my question is:
    Is it a good option to have this Catalyst 3560 as my switch for a home network, or is too much hasle?
    If it is too much can one of you point me a good equipment to buy for a home network?
    I will be using streaming from Netflix on my family room.
    On my son’s bedroom I am going to wire his Notebook (DELL INSPIRON 1500) he’s on 3rd grade and starting to use his computer quite a lot.
    In my bedroom I will have another TV SET which I will be hooking up with the internet.
    My brother in law who will be living on the other bedroom uses another Notebook (ASUS) just for games and some streaming.
    In my kitchen we have an Alexa and a small Notebook for music and recipes.
    On my laundry will be for music mostly.
    Nothing fancy, but as I told you before, I have no clue how to configure all this, and what kind of equipment should be fine for me.
    I know how to pass all the CAT-6 through the walls and all the crimping. I even know how to plug on the Switch and use a patch panel to make things neat. But that’s all about it.
    Any help??

  21. Harris Andrea says

    March 22, 2020 at 7:37 pm

    Hello, you didn’t tell us what kind of ISP connection you have and also what kind of ISP equipment (WiFi router etc?).

    The simplest network design is the following:

    You need to collect all RJ-45 cables into a single point and connect everything to the Cisco switch (in the same VLAN). Also, you need to connect the ISP router to the Cisco switch as well and have the router assign IP addresses via DHCP to all client devices.

    The above means that all of the home devices will be getting IP address from the ISP router and use this router for Internet access. You might need to buy 1-2 wifi access points as well in order to extend the wifi network coverage.

  22. ilkay says

    April 22, 2021 at 10:29 pm

    fe 0/1-2 must be fa

  23. Harris Andrea says

    April 23, 2021 at 11:16 am

    thanks, fixed

  24. wan says

    March 12, 2022 at 5:32 am

    Hello,

    I can’t ping from a switch 2 to router via an another switch.
    please help. I can assist further based on your questions and doubts

  25. wamique ali says

    April 28, 2022 at 2:48 pm

    You tutorial is the best one can ask for.
    Do you have this clear instruction in your book and which one is that?.
    Lastly Please find a simple practice lessons for a small network consisting of a Switch
    probably of 48 ports, router (not isp provided), lan printer and couple of nodes connected to switch and some Aps.
    Please provide me the name of your book which also has these.

  26. Harris Andrea says

    April 28, 2022 at 4:35 pm

    Wamique
    My books do not cover the specific content you mention unfortunately.
    Sorry about that

    Harris

  27. Confused says

    October 11, 2022 at 5:32 am

    My router’s ip address or the default gateway is 192.168.254.254 and that is my service provider’s equipment. I have a Cisco 3750 48 port and also have an HP Proliant server i want to connect to my switch. I want to be able to create virtual machines in which my other laptops on the network can utilize. Is this possible? How would i subnet that default gateway address to make more networks?

  28. Harris Andrea says

    October 11, 2022 at 5:55 am

    I guess that you are using the network 192.168.254.0/24 (with IP address range between 192.168.254.1 up to 192.168.254.254).
    The simplest scenario is to have all of your Virtual Machines and Laptops in the network range above and assign them IP addresses from the above range (except 192.168.254.254 of course which is already assigned to the default gateway).

Leave a Reply

Your email address will not be published. Required fields are marked *

This site uses Akismet to reduce spam. Learn how your comment data is processed.

Search this site

About Networks Training

We Provide Technical Tutorials and Configuration Examples about TCP/IP Networks with focus on Cisco Products and Technologies. This blog entails my own thoughts and ideas, which may not represent the thoughts of Cisco Systems Inc. This blog is NOT affiliated or endorsed by Cisco Systems Inc. All product names, logos and artwork are copyrights/trademarks of their respective owners.

Amazon Disclosure

As an Amazon Associate I earn from qualifying purchases.
Amazon and the Amazon logo are trademarks of Amazon.com, Inc. or its affiliates.

Search

BLOGROLL

Tech21Century
Firewall.cx

Copyright © 2023 | Privacy Policy | Terms and Conditions | Hire Me | Contact | Amazon Disclaimer | Delivery Policy

299 shares