The cellular mobile network has evolved so much the last decades with improved coverage, speed and reliability. Therefore it is now possible to use the 3G/4G cellular mobile network as a reliable backup-up connection of your main connection line.
Cisco has several router devices that have either an embedded 3G/4G modem or a standalone HWIC (High-speed Wan Interface Card) that that can be attached to a modular router. Some of the routers currently in Cisco’s portfolio that are enabled for 3G connections are the following:
Cisco 881G-U
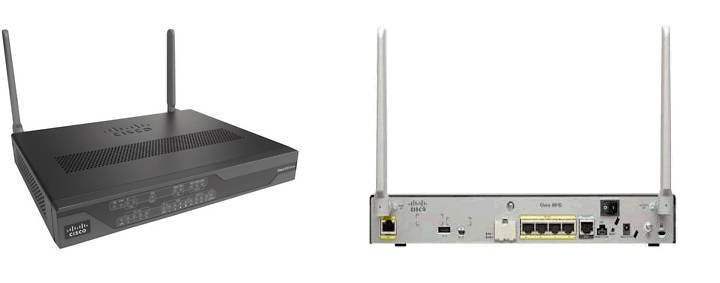
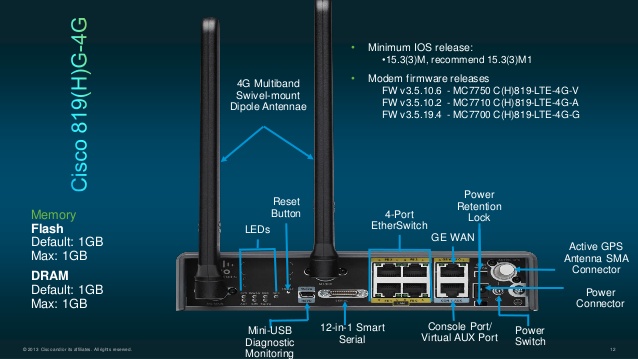
Cisco 819G
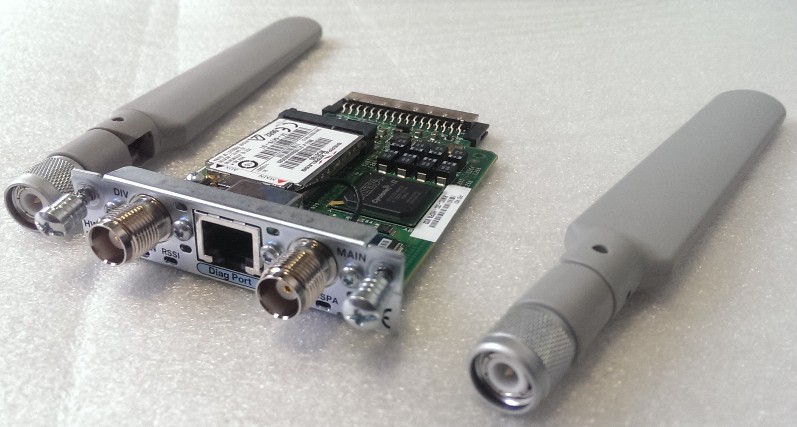
3G WAN interface Card
Configuration
This tutorial will focus on the configuration of the 3G interface of Cisco 881G-U router.
The configuration below looks very similar with configuring old type dial-up modems. Those of us that have worked with these old-type modems will remember :)
Step 1 :
Configure a GSM profile, in this case 1. This command is not done in configuration mode.
NOTE:
For APN you must use the APN name provided by your cellular provider ex: internet, static, custom etc.
For “username” and “password” you must use the credentials (if any) provided by your cellular provider.
Step 2 :
Configure the ATDT settings related to the created profile, in our case 1
NOTES:
- On a 3G router you can define up to three 3G profiles with different APN names and credentials.
- When using “ATDT*99*1#” you use the default profile (default is one). If you use “ATDT*98*2#” the IOS will choose the specified profile number, i.e #2
Step3 :
Configure the cellular interface
ip address negotiated < ———– The ip address is negotiated with the GGSN
encapsulation ppp < ———- The type of encapsulation
dialer in-band
dialer idle-timeout 0
dialer string gsm
dialer-group 1 < ——— The ACL configured for the dialer, in this case ACL 1
async mode interactive
ppp chap hostname <username> < —- The username and the authentication method
ppp chap password <password> < ——The password and the authentication method
ppp ipcp dns request
NOTE: Username/password should be given by the mobile network provider.
Step4:
Configure the ACL for the dialer. This ACL defines the interesting traffic that will trigger the dialer.
dialer-list 1 protocol ip list 1
Step 5 :
Configure the line for 3G connectivity. You can execute “show line” first to see which one is used for your particular router model (in our case, line 3 is used).
exec-timeout 0 0
script dialer gsm
login
modem InOut
no exec
transport input all
Verification Commands
After you have applied the config above, you should have an IP address assigned by the provider.
Interface IP-Address OK? Method Status Protocol
Cellular0 172.17.100.100 YES IPCP up up
The following are some commands that can be used to verify or troubleshoot some aspects of the 3G connection. The output is pretty straight forward.
Current Service Status = Normal, Service Error = implicitly detached
Current Service = Combined
Packet Service = HSPA (Attached)
Packet Session Status = Active
Current Roaming Status = Home
Network Selection Mode = Automatic
Country = ROU, Network = Vodafone
Mobile Country Code (MCC) = 226
Mobile Network Code (MNC) = 5
Location Area Code (LAC) = 7001
Routing Area Code (RAC) = 120
Cell ID = 10130
Primary Scrambling Code = 219
PLMN Selection = Automatic
Registered PLMN = , Abbreviated =
Service Provider = Vodafone
Modem Firmware Version = K2_0_7_44AP C:/WS/FW
Modem Firmware built = 09/10/10
Hardware Version = 1.0
International Mobile Subscriber Identity (IMSI) = 226050120154488
International Mobile Equipment Identity (IMEI) = 354226045216093
Integrated Circuit Card ID (ICCID) = 8940051108090544881
Mobile Subscriber International Subscriber
IDentity Number (MSISDN) =
Factory Serial Number (FSN) = C9A290214351009
Modem Status = Online
Current Modem Temperature = 62 deg C, State = Normal
PRI SKU ID = 9993456, SKU Rev. = 1.3
Data Transmitted = 119503320 bytes, Received = 123091979 bytes
Profile 1, Packet Session Status = ACTIVE
IP address = 172.17.100.100
Negotiated QOS Parameters:
Precedence = High Priority, Delay = Class 4
Reliability = Unack GTP, LLC, Ack RLC, Protected data
Peak = 256 kB/sec, Mean = 50000 kB/hr
Traffic Class = Background
Uplink Max = 11.5Mbps, Guaranteed = Subscribed
Downlink Max = 16Mbps, Guaranteed = Subscribed
Radio power mode = ON
Current Band = WCDMA 2100, Channel Number = 10589
Current RSSI = -100 dBm
Band Selected = Auto
Number of nearby cells = 2
Cell 1
Primary Scrambling Code = 0xDB
RSCP = -103 dBm, ECIO = -11 dBm < – this output is important because it shows the signal strength and quality
Cell 2
Primary Scrambling Code = 0x8C
RSCP = -105 dBm, ECIO = -15 dBm
If needed you can reset the cellular modem without resetting the router as shown below:
hostname (config)# exit
hostname # test cellular 0 modem-power-cycle < —— for rebooting
hostname # test cellular 0 modem-reset < ————— for resetting
Debugging can be done by issuing the following commands:
debug modem
debug dialer
debug ppp negotiation
debug ppp authentication
Some notes regarding the usage of the cellular interface:
- The cellular interface will not come up if there is no traffic across it, so if this connection is used for back-up you have to generate some traffic through the cellular interface. You can route a class and generate a ping, it is not required to have reply, just to send packets.
- If you have a GRE tunnel configured through the cellular network be sure to route the end point of the GRE tunnel through the cellular interface, otherwise the tunnel will be down because the router detects recursive routing.
- If you use the 3G connection for back-up with an GRE tunnel and a routing protocol enabled I have found out that in some cases the cellular interface will “lose” the IP address because there is no traffic over the link (the hello messages of the routing protocol will not help) and because of this I recommend using IPSLA to generate traffic over the link so it is always up (see IPSLA commands below).
ip sla 1
icmp-echo 8.8.8.8 source-interface Cellular0
threshold 1000
timeout 1000
frequency 1
ip sla schedule 1 life forever start-time now
DOWNLOAD TUTORIAL AS PDF FILE
DOWNLOAD FULL ROUTER CONFIGURATION
Related Posts
- How to Configure Port Forwarding on Cisco Router (With Examples)
- Redistribution and OSFP – Discussion With Cisco Commands Examples
- Cisco HSRP States and Troubleshooting (With Commands)
- Cisco Router Login – GUI Login and How to Secure Your Access
- Route Filtering and OSPF – Workaround With Distribute List Filtering