Simple Network Management Protocol (SNMP), so “simple” yet so powerful. SNMP delivers a standardized framework that can be used for the monitoring and management of network devices.
SNMP is one of the most powerful tools that can be used by today’s network administrators and engineers.
SNMP allows admins to poll for data such as CPU usage, memory usage, bandwidth usage and many other items.
SNMP polls network devices for this information using MIBs (Management Information Base). These MIBs are nothing more than a standardized collection of objects that can be queried for information.
Network monitoring using SNMP can be a huge benefit to any network administrator. Many applications can be used to collect this SNMP data and produce trending graphs and reports.
Some of the following well-known applications can be found in and around many networking environments: Cisco Prime, PRTG, Solarwinds NPM, MRTG.
Lets take a closer look at the “simple” configuration of SNMP.
Configuration Tasks:
- Create standard ACL to permit SNMP server.
- Configure SNMP Community String for read-only or read-write access, and reference ACL.
- Configure Optional identification information.
- Configure SNMP traps to be sent to SNMP Management Server.
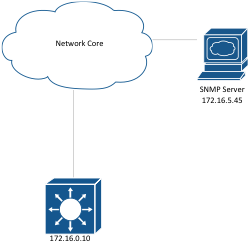
- Designate the SNMP server

Commands:
1. access-list 10 permit 172.16.5.45 0.0.0.0
Creates a standard access-list that permits host 172.16.5.45.
2. snmp-server community MON!T0R RO 10
Configures a read-only community string called MON!T0R and uses access-list 10 to state who is allowed to use that community string, in this case only host 172.16.5.45.
Optional:
3.
snmp-server location 1370 NoWhere Ln, NC 28652
snmp-server contact Network Admin | 336-679-3444
snmp-server chassis-id IDF10-AS1
Configures optional SNMP information for device identification. These identification settings state where the device is located and whom is responsible for the device.
4. snmp-server enable traps %trap%
Configures SNMP traps to be sent to 172.16.5.45 when events occur. By using the “?” where the %trap% is located you will be presented with a list of all traps that can be sent.
5. snmp-server host 172.16.5.45 version 2c MON!T0R
Designate the SNMP server IP (172.16.5.45), the version to use (2c) and the community string.
At this point you have created a basic SNMP community string and provided security by using an ACL to permit access to only devices needed. Now you should be able to view information that is polled by your SNMP Server.
NOTES:
- The community string (MON!T0R) must also be configured in the server (e.g PRTG, Solarwinds, Auvik, ManageEngine etc) in order to successfully allow the Cisco device to communicate with the snmp server.
- Sometimes you will see the default community strings (e.g public, private) in some configurations. This is a bad security practice. You must change these strings to something strong.
- The above configuration works on both Cisco routers and switches.
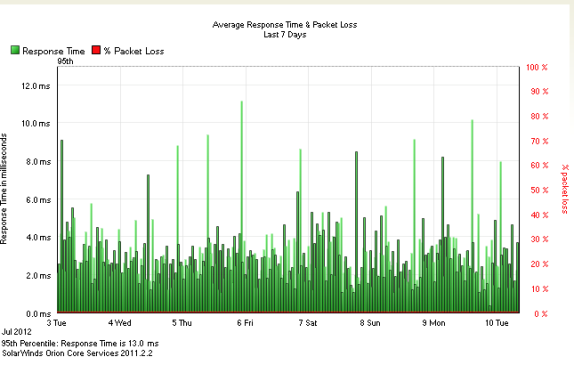
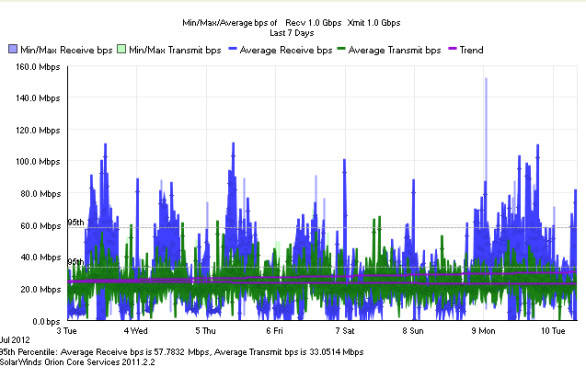
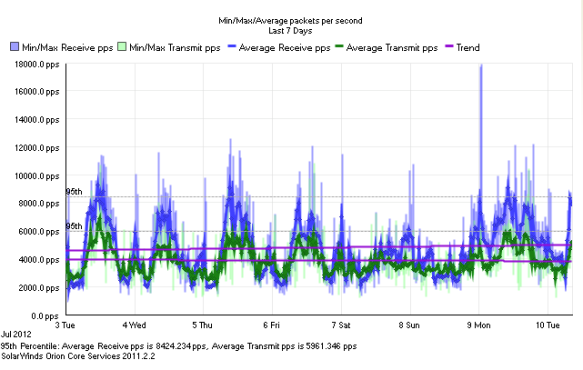
Below are some examples of the information that can be polled by an SNMP Management Server:


What is SNMP Community String
Consider the Community String as the password that must be used between the SNMP server and the networking device (e.g Cisco router, switch, firewall etc) in order to allow each other to communicate. It is analogous to an API key that you must have in order to communicate with an API end-point.
The community string is configured on both the network device and the SNMP server application. It can also be RO (Read-Only) or RW (Read-Write). So, you can have two different community strings, one RO and one RW with different values.
As mentioned before, many network vendors have a default community string configured, which is “public” (for the RO) and “private” (for the RW). You must not used these default community strings. You must change them both on the network device and on the SNMP server as well.
Note also that community strings are transmitted un-encrypted (clear text) in the network and can be stolen easily with a network sniffer.
Therefore, a better security practice is to implement also an ACL (Access Control List), just like our example above, which allows only the SNMP server IP to communicate with the network device.
SNMP versions
Currently there are 3 SNMP versions as below:
- SNMP v1: This is the original version which uses community strings to communicate. This version has critical performance limitations and should be avoided.
- SNMP v2c: This is an upgraded version from v1 but still uses the same community strings communication method. However, it has several performance enhancements over the original version.
- SNMP v3: This is the latest version and introduces enhancements in both security and performance. For example, SNMPv3 provides message integrity, authentication, and encryption.
Related Posts
- Introduction to Cisco EEM (Embedded Event Manager)
- What is Cisco IOS – Overview and Description of Cisco’s Operating System
- Comparing Cisco IOS Configurations (Config Compare Tools)
- Cisco Access List Configuration Examples (Standard, Extended ACL) on Routers Etc
- PPTP Remote Access VPN Configuration on Cisco Routers