In today’s Internet world, a WiFi connection is a must in any enterprise network, either for employees or for guests and other customers that are requesting a wireless connection for better productivity. There is a study showing that 5-7 years ago when WiFi was at its beginning stages, only 10% of devices were connected to it (most of them being laptops). Now at the beginning of the IOT (Internet of Things) era, Wi-Fi is being used more than the fixed Ethernet line mostly because there is an increased number of devices that are always connected (smart phones, tablets, TVs, home security systems etc).
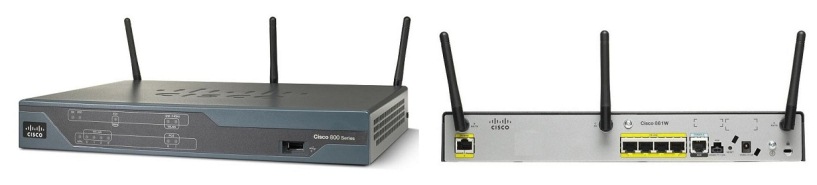
In this tutorial we will discuss WiFi configuration on Cisco 881W router (shown on the image below). This tutorial is also applicable for other WiFi models such as Cisco 891W, 886W, 888W etc.
Usually, Cisco’s recommendation for an enterprise Wi-Fi solution is to use a Wireless LAN Controller (WLAN) which will manage and control the wireless Access Points (AP) of the whole WiFi network. However, in smaller SOHO networks, a basic WiFi solution usually involves a small size router equipped with WiFi hardware.
Cisco has released such WiFi routers in the 800 and 1900 series that have a built in AP. In this tutorial we will see how to configure a Cisco 881W router, both the WiFi and the router configuration commands.
The scenario examined in this post is to have two WiFi SSIDs, one for Employees and one for Visitors. Each SSID must be mapped to a particular VLAN as shown below:
- SSID “Employees” : vlan 10 (192.168.10.0/24)
- SSID “Visitors” : vlan 20 (192.168.20.0/24)
Note: The vlans must be created on both the AP and the router itself.
Configuration of Cisco 881W:
Note: The wireless Access Point (AP) inside the Cisco 881w is a separate module and you must connect to it from the router.
To connect to the AP side of the router you must issue the following command:
service-module wlan-ap 0 session
You can use Cisco/Cisco as username/password
To disconnect from the AP, you need to use the following keyboard combination:
Control-Shift-6 x
Access Point Configuration
Configure SSIDs inside the AP environment:
Company_AP (config)# dot11 ssid Employees < —– Name of the SSID
Company_AP (config-ssid)# vlan 10 < —– Vlan Used
Company_AP (config-ssid)# authentication open
Company_AP (config-ssid)# authentication key-management wpa < —— Authentication method
Company_AP (config-ssid)# guest-mode
Company_AP (config-ssid)# mbssid guest-mode < —— Required when broadcasting multiple SSIDs
Company_AP (config-ssid)# infrastructure-ssid optional
Company_AP (config-ssid)# wpa-psk ascii 0 [employees_password ] < —— Sets the SSID password
Company_AP (config)# dot11 ssid Visitors
Company_AP (config-ssid)# vlan 20
Company_AP (config-ssid)# authentication open
Company_AP (config-ssid)# authentication key-management wpa
Company_AP (config-ssid)# guest-mode
Company_AP (config-ssid)# mbssid guest-mode
Company_AP (config-ssid)# infrastructure-ssid optional
Company_AP (config-ssid)# wpa-psk ascii 0 [visitors_password]
Company_AP (config)# dot11 vlan-name vlan10 vlan10 < — Maps the vlan number to the vlan name
Company_AP (config)# dot11 vlan-name vlan20 vlan20 < — Maps the vlan number to the vlan name
Configure the radio interface and assign the SSIDs
Company_AP (config)# interface Dot11Radio0 < —- The radio interface
Company_AP (config-if)# no shutdown
Company_AP (config-if)# encryption vlan10 mode ciphers tkip < —– The encryption being used
Company_AP (config-if)# encryption vlan20 mode ciphers tkip
Company_AP (config-if)# ssid Employees < — SSID assigned to this radio interface for broadcasting
Company_AP (config-if)# ssid Visitors < — SSID assigned to this radio interface for broadcasting
Company_AP (config-if)# mbssid < —- broadcast both SSIDs
Company_AP (config-if)# station-role root < – — The AP works as a standalone AP
Company_AP (config-if)# speed basic-1.0 2.0 5.5 11.0 6.0 9.0 12.0 18.0 24.0 36.0 48.0 54.0 m0. m1. m2. m3. m4. m8. m9. m10. m11. m12. m13. m14. m15. <—- sets the speeds for 802.11 b/g/n
Configure the Dot11Radio0 radio sub-interfaces
Company_AP (config)# interface Dot11Radio0.10 < – Create the subinterface
Company_AP (config-subif)# encapsulation dot1Q 10 < —- Sets the encapsulation and vlan
Company_AP (config-if)# no shutdown
Company_AP (config-subif)# no ip route-cache
Company_AP (config-subif)# bridge-group 10 < —– maps the subinterface to a specific bridge group
Company_AP (config-subif)# bridge-group 10 subscriber-loop-control < — Enables loop control on virtual circuits associated with a bridge group.
Company_AP (config-subif)# bridge-group 10 block-unknown-source < — Blocks traffic that comes from unknown MAC address sources
Company_AP (config-subif)# no bridge-group 10 source-learning
Company_AP (config-subif)# no bridge-group 10 unicast-flooding
Company_AP (config-subif)# bridge-group 10 spanning-disabled
Company_AP (config)# interface Dot11Radio0.20
Company_AP (config-subif)# encapsulation dot1Q 20
Company_AP (config-if)# no shutdown
Company_AP (config-subif)# no ip route-cache
Company_AP (config-subif)# bridge-group 20
Company_AP (config-subif)# bridge-group 20 subscriber-loop-control
Company_AP (config-subif)# bridge-group 20 block-unknown-source
Company_AP (config-subif)# no bridge-group 20 source-learning
Company_AP (config-subif)# no bridge-group 20 unicast-flooding
Company_AP (config-subif)# bridge-group 20 spanning-disabled
Configure Gi0, subinterfaces and BVI on the AP
As I mentioned before, the AP side is separated from the router itself and you can regard it as a switch. At this point we configure the downlink to the router (GigabitEthernet0 being the downlink interface). The rest of the config is similar to the above configuration for Dot11Radio0 interface.
Company_AP (config)# interface GigabitEthernet0
Company_AP (config-if)# description downlink to the router < — see description
Company_AP (config-if)# no shutdown
Company_AP (config-if)# no ip address
Company_AP (config)# interface GigabitEthernet0.10
Company_AP (config-if)# encapsulation dot1Q 10
Company_AP (config-if)# no shutdown
Company_AP (config-if)# no ip route-cache
Company_AP (config-if)# bridge-group 10
Company_AP (config-if)# no bridge-group 10 source-learning
Company_AP (config-if)# bridge-group 10 spanning-disabled
Company_AP (config-if)# exit
Company_AP (config)# interface GigabitEthernet0.20
Company_AP (config-if)# encapsulation dot1Q 20
Company_AP (config-if)# no shutdown
Company_AP (config-if)# no ip route-cache
Company_AP (config-if)# bridge-group 20
Company_AP (config-if)# no bridge-group 20 source-learning
Company_AP (config-if)# bridge-group 20 spanning-disabled
Company_AP (config-if)# exit
Company_AP (config)# interface BVI1
Company_AP (config-if)# ip address 192.168.10.10
Company_AP (config-if)# no ip route-cache
NOTE:
The BVI interface above is actually the management interface of the AP and best practice is to assign an IP address from the trusted LAN (employees LAN vlan10).
Remember to enable routing for bridge 10.
Company_AP (config)# bridge 10 route ip
At this point you can exit the AP side configuration using “Control-Shift-6 x” command
Router Configuration
Configure VLANS, Interfaces, DHCP and uplink to the AP on the router :
Vlans:
Company_Router(config)#vlan 10
Company_Router(config)#vlan 20
Interfaces:
Company_Router (config)# interface Vlan10
Company_Router (config-if)# description Employees
Company_Router (config-if)# ip address 192.168.10.1 255.255.255.0
Company_Router (config-if)# ip nat insideCompany_Router (config)# interface Vlan20
Company_Router (config-if)# description Visitors
Company_Router (config-if)# ip address 192.168.20.1 255.255.255.0
Company_Router (config-if)# ip nat inside
DHCP:
Company_Router(config)# ip dhcp pool Employees
Company_Router(dhcp-config)# network 192.168.10.0 255.255.255.0
Company_Router(dhcp-config)# dns-server 8.8.8.8
Company_Router(dhcp-config)# default-router 192.168.10.1
Company_Router(config)# ip dhcp pool Visitors
Company_Router(dhcp-config)# network 192.168.20.0 255.255.255.0
Company_Router(dhcp-config)# default-router 192.168.20.1
Company_Router(dhcp-config)# dns-server 8.8.8.8
Uplink to AP:
Company_Router(config)# interface Wlan-GigabitEthernet0
Company_Router(config-if)# description uplink to AP
Company_Router(config-if)# switchport mode trunk < — on the AP side remember that there are subinterfaces configured so we must set this side to trunk mode to allow tagging of vlan 10 and 20
WAN interface:
Company_Router(config)# interface Fa4
Company_Router(config-if)# description TO ISP
Company_Router(config-if)# ip address 1.1.1.1 255.255.255.0
Company_Router(config-if)#no shutdown
Company_Router(config-if)#ip nat outside
ACL matching the networks:
Company_Router(config)# ip access-list extended NAT_ACL
Company_Router(config-acl)#permit ip 192.168.10.0 0.0.0.255 any
Company_Router(config-acl)#permit ip 192.168.20.0 0.0.0.255 any
NAT:
Company_Router(config)#ip nat inside source list NAT_ACL interface Fa4 overload
At this point we have finished configuring both the AP with the interfaces and SSID’s and also the router for basic internet access.